
How to iron trousers
Ironing trousers can sometimes feel like a chore, but it’s worth remembering that removing the creases and wrinkles from a pair of trousers can transform the look of your outfit as a whole. Crisp pleats and smooth lines exude confidence and demonstrate attention to detail. It can be a great way to look polished when heading to the office, a wedding or a party.
Learning how to iron trousers can give you an extra trick to try whenever you want to elevate an outfit from creased to classic. Keep reading to learn more.
How to iron suit trousers
Ironing trousers isn’t just good for removing creases. It can also help the trousers to drape better, emphasising the tailored lines of the garment and flattering the wearer’s silhouette. On top of that, ironing can help to kill off bacteria and other germs to freshen up the fabric, which can be especially helpful if you haven’t worn the trousers for a while.
Below, we’ll outline three methods of removing creases from your trousers, using:
- A handheld iron
- A trouser press
- A steamy bathroom.
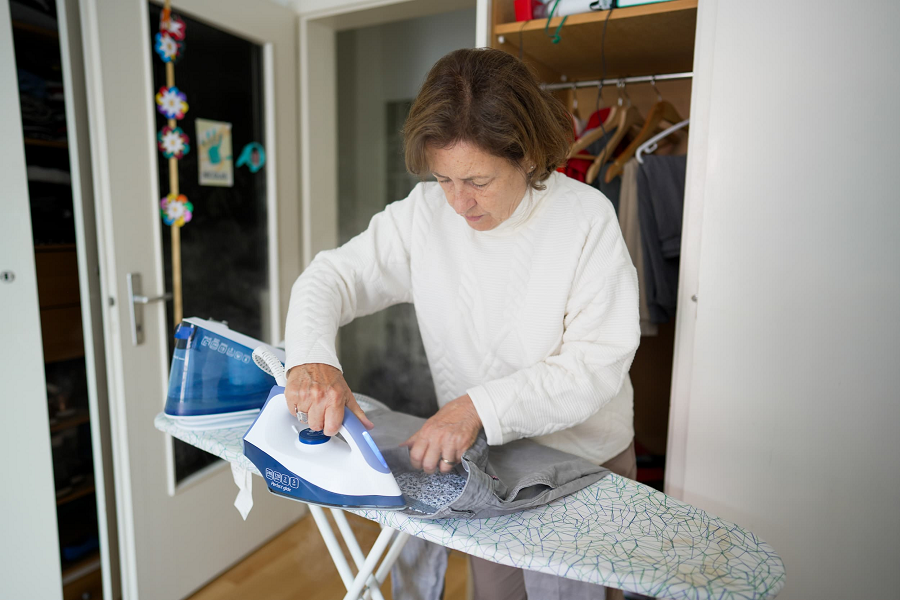
How to use a handheld iron on trousers
Probably the most common method of ironing your trousers at home is by using a handheld iron to get the job done. As well as the iron itself, you’ll need an ironing board, a pressing cloth to protect delicate materials and some distilled water to go into the iron (or water from your tap if you live in an area with soft water).
- Prepare your trousers
Turn your trousers inside out so that the surface of the iron will only touch the inside of the fabric. Make sure to empty the pockets and close any zips, buttons or other fastenings. Then check the garment care label for recommended ironing temperatures. This will also tell you if you can safely use your iron’s steamer function.
- Start with the pockets
Lay your pockets flat on the ironing board turned inside out. These should just need a quick press from the iron to remove wrinkles and creases.
- Move onto the waistline area
Beginning with the waistband, press your iron over the fabric of the trousers. Be mindful of any intentional creases or pleats in the fabric – try to work with these to reinforce them and avoid undoing the folds.
- Iron the legs of the trousers
Lay one trouser leg flat on the ironing board so that the side seam – found on the inside and outside leg when wearing the trousers – lies in the centre of the fabric. Smooth the fabric out with your hand to make it relatively flat, then use the iron to press out any remaining creases. Take your time to do this, pressing the fabric and lifting the iron off again rather than running the iron along the fabric. This helps to avoid creating wrinkles.
Once you're happy with one leg, repeat the process for the other leg.
- Add the finishing touches
Now that you’ve ironed everything inside out, turn the trousers the right side out and use the iron with a pressing cloth between it and the fabric to remove any last wrinkles or creases. This is a good time to touch up any small areas such as the belt loops, the flap over a zipper and any front pleats, which can be harder to iron from the inside.
If you’re not going to be wearing your trousers immediately after ironing them, either lay them flat or hang them up to reduce the likelihood of new creases forming in the meantime.
How to use a trouser press
Some hotels include a trouser press in the room to make ironing your clothes easier on the go – but it can be a daunting prospect if you’ve never used one before. Fortunately, it’s much simpler than it looks once you get started, so you’ll soon be able to use a trouser press with confidence.
- Prepare the press – and yourself
The first and most important thing to do is to get to grips with the specific model of trouser press you’re using. There should be instructions with it that you can follow – familiarise yourself with these before you try to use the press. Most trouser presses have a timer and various heat settings to suit different fabrics, so make sure you know what these are. Check if the press needs to preheat before use and set that up if it does.
- Prepare your trousers
As with using an iron, it’s important to prep your trousers. This means turning them inside out and checking the garment care label – if it says it’s safe to iron, then it’s almost always safe to use with a trouser press. Empty any and all pockets in the trousers and close any fastenings. It can also be helpful to use your hand to smooth out the legs to give the trouser press a head start.
- Set the press up
First, lay one trouser leg flat on the bottom plate. Some models have a crease guide – if yours does, then align the front crease of your trousers with this to achieve the best results. Secure the trouser leg using the built-in clips, then do the same for the other leg. If you’re working with a delicate fabric, then use a pressing cloth between the press and your trousers to help protect them.
Next, you’ll need to attach a clothes hanger in the designated spot, usually found at the top of the press. This helps to maintain the shape of the trousers while they’re pressed. Many trouser presses supply a hanger for this purpose, or you can find one from the wardrobe that fits the press.
- Let the press do its magic
Close the press firmly on your trousers, then set the timer according to what type of fabric you’re working with. The manufacturer’s instructions will include recommendations for different types of material such as wool, cotton, synthetics and linens. While the trouser press works its magic, you can leave it to it and get on with something else during the wait.
Once the timer goes off, you can open the press carefully and remove your trousers. Lay them flat and allow them to cool to give any pleats time to set in and prevent wrinkles from forming.
How to steam trousers in a bathroom
If you haven’t an iron or trouser press to hand, then steaming your trousers in a bathroom can work in a pinch to remove the worst of the wrinkles. This method generally works best if you’re already intending to have a bath or a shower, rather than doing so just to steam your trousers.
- Prepare the bathroom and your trousers
For this method, you will need your trousers, a hanger and your bath or shower. Like with the other techniques, it’s a good idea to fasten any zips or buttons and empty the pockets of your trousers, as this will help to ensure the trousers keep their natural shape during the steaming process.
Hang your trousers somewhere in your bathroom – preferably somewhere that they won’t get splashed with water accidentally or be sitting in condensation. Close all doors and windows to trap the steam inside.
- Turn on the water
Whether you’re having a bath or a shower, turn it on hot to start generating steam. As the trousers dampen and gravity gets to work, the creases should start to loosen and disappear. Leave the trousers in the steam for around 20 minutes to give it time to work.
- Hang your trousers elsewhere to dry
Once you’re happy with your newly steamed pair of trousers, let them air for a good while to dry completely.
While this method can be handy when you’ve got nothing else to try, it’s important to remember that it usually works best with light to medium weight fabrics. Heavier fabrics tend to need additional pressing to create a sharp crease and can take longer to dry.
See our privacy policy to understand how we process your data to send you marketing emails


Copyright © 2025 Chums
PayPal Representative Example:
Representative 23.9% APR (variable) Purchase interest rate 23.9% p.a. (variable) Assumed Credit limit £1,200. PayPal Credit and PayPal Pay in 3 are trading names of PayPal UK Ltd, 5 Fleet Place, London, United Kingdom, EC4M 7RD. Terms and conditions apply. Credit subject to status, UK residents only, Chums Ltd acts as a broker and offers finance from a restricted range of finance providers. PayPal Pay in 3 is not regulated by the Financial Conduct Authority. Pay in 3 eligibility is subject to status and approval. 18+. UK residents only. Pay in 3 is a form of credit. Check if affordable and how you will repay. May make other borrowing more difficult or expensive. See product terms for more details.
